Have you ever wondered if a 3/4″ copper compression union can halt leaks faster than soldering or push-fit repairs? This brief introduction highlights the 3/4″ Copper Compression Union as a reliable, contractor-grade plumbing connector. It works well for both DIY homeowners and professional plumbers. This union provides a swift fix, often eliminating the need for a torch, special solder, or extended downtime.
This webpage is about 3 4 Compression Fittings
Its design is simple, using a nut and ferrule to form a tight, leak-proof seal on copper tubing. Because of this simplicity, it remains a favored option and is stocked by wholesalers such as Installation Parts Supply for same-day shipping on urgent repairs.
Subsequent sections will delve into how the 3/4″ copper compression union functions. They will also compare its strengths against brass and push-fit options while outlining step-by-step guidance for a strong, long-lasting connection.
Understanding What A 3/4″ Copper Compression Union Is And How It Works
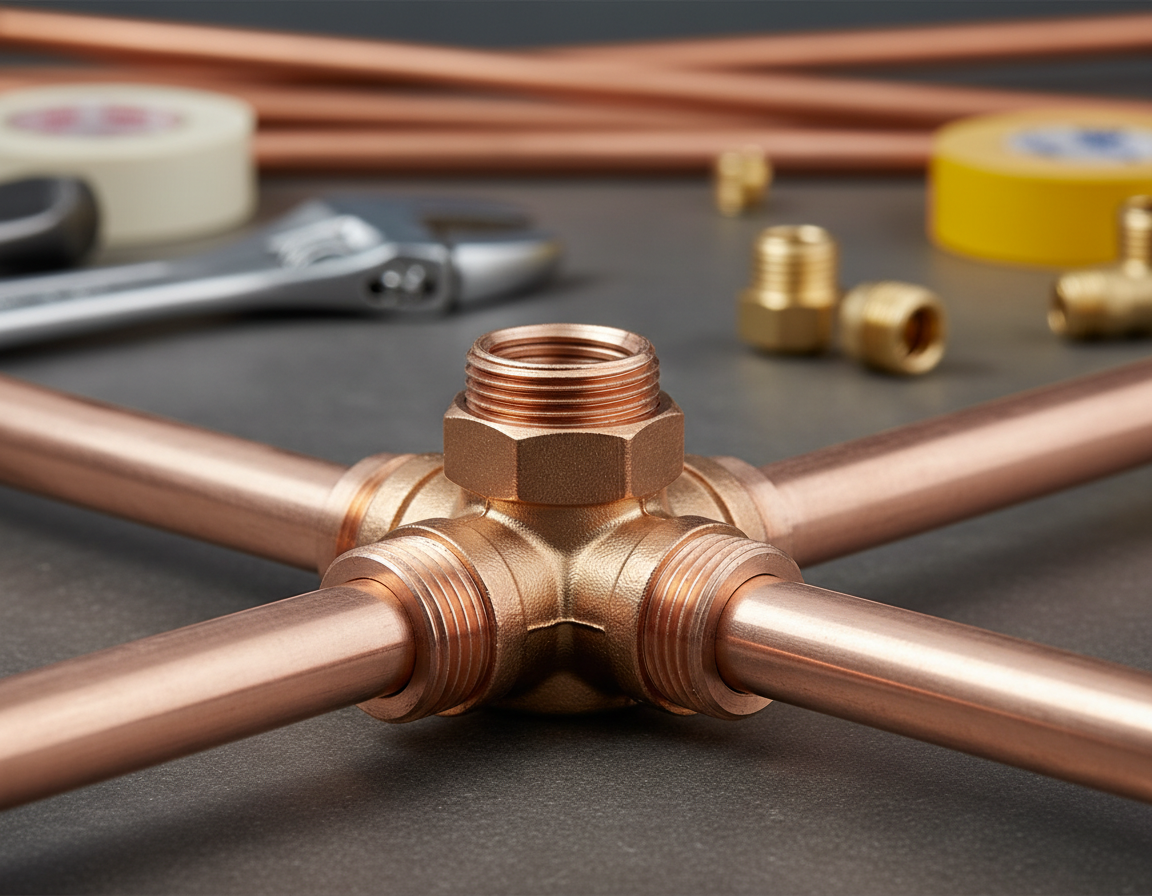
The 3/4 inch copper union is a simple copper pipe fitting that joins two pipe ends of the same nominal size without soldering. It includes a union body, two nuts, and ferrules. This design is ideal for repairs, accessible joints, and installations where heat from soldering is not an option.
Definition of a compression union
This fitting creates a removable mechanical joint by tightening nuts that compress ferrules onto the pipe ends. Those ferrules lightly deform and bite into the pipe outer diameter to create a tight seal against the union body. Plumbers commonly use this fitting for fast replacements and serviceable supply-line connections.
How the compression action creates a leak-proof seal
As each nut is tightened, it forces the ferrule inward. The ferrule compresses evenly around the pipe and seats into the union body. When aligned correctly and tightened to the proper torque, it forms a leak-proof connection suitable for potable water. Too little tightening can cause seepage, while overtightening may distort the ferrule and ruin the seal.
Why copper is used: corrosion resistance and durability
Because copper naturally resists corrosion and remains dimensionally stable, the 3/4 inch copper union offers long service life. Copper fittings generally resist wear under typical water conditions better than many plastics and some metals. That reliability makes copper a preferred material for durable, long-lasting plumbing repairs.
| Feature | 3/4 inch copper union | Common alternative |
|---|---|---|
| Construction material | Copper | Plastic or brass |
| Seal method | Ferrule-based compression sealing for a leak-proof connection | Push-fit or soldered joints |
| Ease of service | Serviceable and removable | Push-fit may be removable; soldered is permanent |
| Resistance to corrosion | High | Varies; brass good, some plastics inert |
| Usual applications | Quick repairs, transitions, accessible joints | Long runs, concealed soldered connections |
Why Choose A Copper Pipe Fitting For Repairs
When selecting plumbing repair parts, the choice matters greatly for long-term performance. Copper pipe fittings stand out due to their strength and proven longevity in both potable water and HVAC systems. A high-quality copper compression union ensures a durable joint, capable of withstanding mechanical stress and routine maintenance.
Durable copper union vs. brass and plastic alternatives
Copper unions boast superior mechanical strength and resist deformation under torque. Compared with brass compression couplings from brands like Thrifco Plumbing, copper is generally more compatible with copper pipe systems. Although plastic push-fit couplings install quickly, they do not match copper for heat resistance and long-term durability, especially in high-use or high-temperature environments.
Corrosion-resistant union for long-term reliability
Copper is highly resistant to common corrosion found in potable water systems. When properly installed and paired with compatible metals, a corrosion-resistant union helps reduce the risk of pinhole leaks and mineral attack. Routine inspections and proper water chemistry are important for helping the fitting deliver a long service life as a dependable plumbing repair part.
Applications where copper compression unions are preferred
These unions are often preferred for residential potable water lines, HVAC supply and return lines, and commercial work where durability is critical. They are well suited to situations where future disassembly or servicing may be needed, making them useful for both contractors and homeowners. Distributors such as Installation Parts Supply stock contractor-grade copper unions for these common uses.
Materials, Sizes, And Compatibility Considerations
When choosing a plumbing connector, both material and size are critical. Copper unions are known for their corrosion resistance and clean appearance. You should always confirm whether the fitting is intended for nominal pipe size or outside diameter before installation.
3/4 inch copper union size details is important, particularly when IPS or OD standards are involved. A typical 3/4 inch copper union matches 3/4″ IPS, but copper tube is sold according to OD. Always review product specifications and measure the tube OD to avoid mismatches, especially in tight spaces.
Compression fitting compatibility details can vary by manufacturer and pattern. Many compression unions are compatible with hard copper tubing. However, when working with PEX or CPVC, use adapter fittings approved by the pipe manufacturer’s maker to maintain warranty and code compliance.
The choice between a compression fitting and a soldered or push-fit joint depends on the project’s needs. Compression fittings are especially useful for quick repairs, removable joints, or situations where heat cannot be used. Soldered connections are better suited to permanent, tamper-resistant seals in hidden installations. Push-fit fittings offer tool-free installation but have limitations on pressure, temperature, and longevity.
Before buying, verify whether the fitting is a short pattern or a standard pattern so that clearance is adequate. Measure the nut and ferrule stack and check if the product lists compatibility as a specific combination, such as a brass coupling for IPS versus copper OD. This step prevents unnecessary trips and reorders.
| Factor | Compression Union | Soldered Joint | Push-Fit |
|---|---|---|---|
| Installation speed | Fast, tool-limited | Slower, requires torch | Fastest option, tool-free |
| Can it be removed? | Serviceable and removable | Permanent connection | Removable on some models |
| Recommended use | Repairs, heat-sensitive areas | Permanent concealed lines | Fast installs, temporary use, or approved applications |
| Compatible materials | Copper tubing; adapters for PEX/CPVC | Primarily copper, brass | Varies by manufacturer, some PEX/Copper |
| Sizing notes | Confirm 3/4 inch copper union sizing (IPS vs OD) | Ensure tube OD and wall thickness are correct | Use the manufacturer’s sizing chart |
Step-By-Step Installation Guide For An Easy Installation Fitting
Follow this simple installation guide to install a 3/4″ copper compression union with confidence. The steps below cover the tools, preparation, assembly, torque guidance, and leak checks needed for a reliable plumbing connector job. Parts can be sourced from Installation Parts Supply or local plumbing wholesalers for contractor-grade quality and same-day pickup where available.
Tools and preparation
Collect two adjustable wrenches or a wrench with an adjustable spanner, plus a tube cutter, a deburring tool or file, and a torque wrench if exact tightening is preferred. Order ferrules, nuts, and the union body from Installation Parts Supply or a nearby plumbing wholesale distributor to ensure compatibility with your job. It also helps to keep a clean rag and flashlight on hand.
Preparing the pipe ends and parts
Use the tube cutter to make a square cut on the copper pipe. Remove burrs and sharp edges with the deburring tool so the ferrule can seat evenly. Clean the pipe OD of oxidation, paint, and debris. First slide the nut onto the pipe with the threaded end toward the union, then add the ferrule in the correct direction before inserting the pipe into the union body.
Compression union installation assembly
Insert the pipe completely into the union until it reaches the stop. Hand-tighten the nuts on both sides to begin. Use the adjustable wrenches to hold the union body steady while tightening the nut. For most fittings the guideline is the specified number of turns past finger-tight provided by the manufacturer or a torque value if supplied.
Torque guidance and avoiding common mistakes
Do not overtighten, because too much force can deform the ferrule or pipe and cause leaks. If you have a torque wrench, apply the manufacturer’s recommended torque. If no torque is specified, tighten incrementally: wrench one to one-and-a-quarter turns past finger-tight, then test under pressure. Recheck the connection after the first pressurization.
Checking for leaks and finishing up
Turn the water pressure back on and inspect the joint for visible weeps. A dry cloth or paper towel can help reveal slow leaks around the compression fitting. If a small weep appears, tighten the connection slightly. If the leak persists, relieve system pressure and disassemble the joint to inspect or replace the ferrule and nut before reassembling.
| Step | Action | Tip |
|---|---|---|
| 1 | Collect tools from Installation Parts Supply or a local wholesaler | Pick contractor-grade ferrules and nuts for longer service life |
| 2 | Cut the pipe square and deburr it | Clean OD to ensure proper ferrule seal |
| 3 | Place the nut first, then the ferrule, onto the pipe | Position the ferrule according to manufacturer guidance |
| Four | Push the pipe fully into the 3/4″ copper compression union, then hand-tighten | Begin with even hand-tightening on both nuts |
| 5 | Tighten with a wrench to the required turns or torque | Do not overtighten, as it can cause deformation |
| Six | Restore pressure and inspect the joint for leaks | Use a towel to find slow weeps, and relieve pressure before disassembly |
Common Troubleshooting Tips And Quick Connect Fixes
Minor leaks at a compression joint often show as a steady drip at the nut or small weeps after the system is pressurized. First make sure the line pressure is off and the work area is dry. Check the pipe end, the nut, and the ferrule for visible damage before deciding the body is the problem.
Finding and fixing minor leaks
For a simple quick connect fix, begin by tightening the nut to the manufacturer’s recommended turns. If leaking continues, shut down the pressure and disassemble the joint. Inspect the ferrule for nicks, flattening, or distortion and check the nut threads for wear. If the pipe end shows damage, cut it back, deburr it, and reassemble with a fresh ferrule and correct torque to reestablish a leak-proof connection.
When ferrules or the whole compression fitting should be replaced
Replace the ferrules if they display visible distortion or cuts caused during installation. If the nut, body, or threads are corroded, stripped, or cracked, replace the whole compression union. If the same joint keeps leaking, it may point to a material or alignment problem, so it may be worth using a higher-grade contractor fitting from a reputable supplier or changing to a soldered joint for a more permanent leak-proof connection.
Maintenance tips to avoid overtightening or misalignment
Avoid overtightening during the initial assembly. Start by hand and finish with the recommended torque or specified turns past finger-tight. Keep the pipe ends aligned so the ferrule seats evenly and does not cut in at an angle. After installation, inspect the joints once, then check them again under normal service pressure. Regular checks reduce the need for compression fitting troubleshooting and help catch early signs of wear before a leak develops.
| Issue | Likely Cause | Quick Fix | When to Replace |
|---|---|---|---|
| Leak at nut | Minor ferrule seating issue or loose nut | Tighten to manufacturer turns; retest under pressure | Ongoing drip after reassembly |
| Weeping after installation | Debris, imperfect cut, or misaligned pipe | Depressurize, re-cut, deburr, re-seat ferrule | Ferrule is cut or distorted |
| Sudden leak under pressure | A cracked nut or stripped threads | Install a new nut and retest | If the body or threads are damaged, replace the entire fitting |
| Repeated leaks same joint | Poor alignment or the wrong fitting grade | Correct the alignment and tighten to the proper installation torque | Move to a higher-grade fitting or a soldered connection |
Buying Guide: Selecting The Right Plumbing Connector From A Wholesale Distributor
Begin by examining the material specifications and certifications. Ensure the plumbing connector is rated for potable water, has manufacturer certification, and comes with a contractor-grade warranty. Check whether the pattern is short or standard, and verify that the ferrules and nuts are included. Matching the fitting to the pipe OD or IPS before purchase is crucial if you want to avoid returns.
Look for corrosion-resistant features and dependable brands like Mueller Industries, NIBCO, and Viega. In corrosive environments, a durable copper union often outperforms cheaper alternatives. Installation requirements and adapter compatibility should also be considered, particularly in mixed-material setups like copper-to-PEX.
Installation Parts Supply can speed up job-site procurement by stocking contractor-grade copper unions, ferrules, nuts, and matching adapters. They also offer same-day shipping for in-stock items when a fast turnaround is needed. For bulk orders, contact their sales or customer support and cross-reference part numbers to ensure exact matches.
When evaluating value, consider the lifecycle cost, not just the initial price. Online listings may make brass compression couplings like those from Thrifco Plumbing appear cheaper at first glance. However, longevity, corrosion resistance, and maintenance needs should also be factored into the decision. Although a copper union may have a higher initial cost, it can offer lower lifetime costs in aggressive water conditions.
Keep in mind that manufacturer MAP policies may influence the discounts you see online. Some retailers may hide advertised reductions until checkout, so request a final quote if you want accurate comparisons. Ask wholesalers about contractor pricing, return terms, and warranty handling to understand the true value.
If you want a quick comparison, use this short checklist:
- Potable water material certification
- Whether ferrules, nuts, and adapters are included
- Match with the correct pipe OD/IPS
- Brand reputation and contractor-grade quality
- Final cost after MAP, shipping, and warranty terms
Use this checklist when sourcing from Installation Parts Supply or your local wholesale distributor. That approach helps you choose a plumbing connector that offers the right mix of performance, durability, and cost for the job.
Safety, Codes, And Best Practices For Plumbers And DIY Users
Working with a 3/4″ copper compression union requires close attention to safety guidelines and an understanding of local regulations. It’s crucial to verify the necessary requirements before starting any work. Even basic repairs should be handled carefully, particularly when regulated procedures must be followed.
U.S. local code considerations for compression fittings
In the United States, local jurisdictions often have their own rules for compression fittings. Many jurisdictions allow these fittings on both cold and hot water lines as long as they are listed for safe use. Some inspectors, however, may limit particular ferrule types or require brass components that carry certain certifications. Before installing a compression union, always check the local plumbing code requirements and confirm what your inspector expects.
Handling copper fittings safely around pressurized systems
Before loosening any nut, always confirm that the line has been depressurized and drained. When cutting copper pipe, wear eye protection and gloves that resist cuts. Have a fire shield and a Class B-C extinguisher ready if you decide to solder instead of using compression fittings. While compression fittings eliminate the need for heat, they still require a secure and neat assembly.
When a licensed plumber should be called instead of attempting DIY repair
If the task involves gas piping, concealed lines, difficult access, or multi-story risers, it is usually best to call a licensed plumber. They can ensure compliance with fitting codes, select the correct materials for safe use, and safely restore pressurized systems.
| Situation | DIY OK | Call a Licensed Plumber |
|---|---|---|
| Simple supply-line leak at an easy-to-reach union | Usually yes | No, unless leak recurs |
| Work involving hidden walls or ceilings | No | Yes, definitely |
| Gas piping or combined mechanical systems | No, not for DIY | Yes |
| Unclear local code requirements for compression fittings | No | Yes |
| Replacing a basic plumbing repair part such as a ferrule or nut | Yes, with proper tools | Yes, if the repair does not seal properly |
Closing Summary
A 3/4″ copper compression union is a durable plumbing connector for various repair and join tasks. Its corrosion-resistant copper body and properly installed ferrule help ensure a leak-proof connection. That holds true when the pipe ends are properly prepared and the union is tightened to the correct torque.
Opting for a contractor-grade, easy installation fitting from trusted suppliers like Installation Parts Supply guarantees part quality. It also makes same-day shipping possible when time matters most. Before buying, compare copper unions against brass compression couplings and push-fit alternatives. That comparison helps identify the best option based on compatibility, longevity, and job requirements.
Be sure to comply with local codes and use the right tools for the installation. Inspect joints after pressurization to confirm a secure, leak-proof connection. Replace ferrules or fittings if they show signs of wear. For repairs beyond your comfort or code requirements, it’s wise to call a licensed plumber. This helps keep the system safe and compliant.